- Published on
How to Build a Wooden Bench: A Slat Seat in One Afternoon
- Authors

- Name
- Outdoor Wooden Bench
A wooden bench is one of the few pieces of furniture you can build with no joinery at all. No dovetails, no mortise, no dowels. Boards, screws and a drill.
This one measures 48 inches long, 16 inches deep and 17 inches high. Two adults sit on it with room left over.
You need five boards and about four hours. A first-timer with a circular saw can finish it before the light goes.
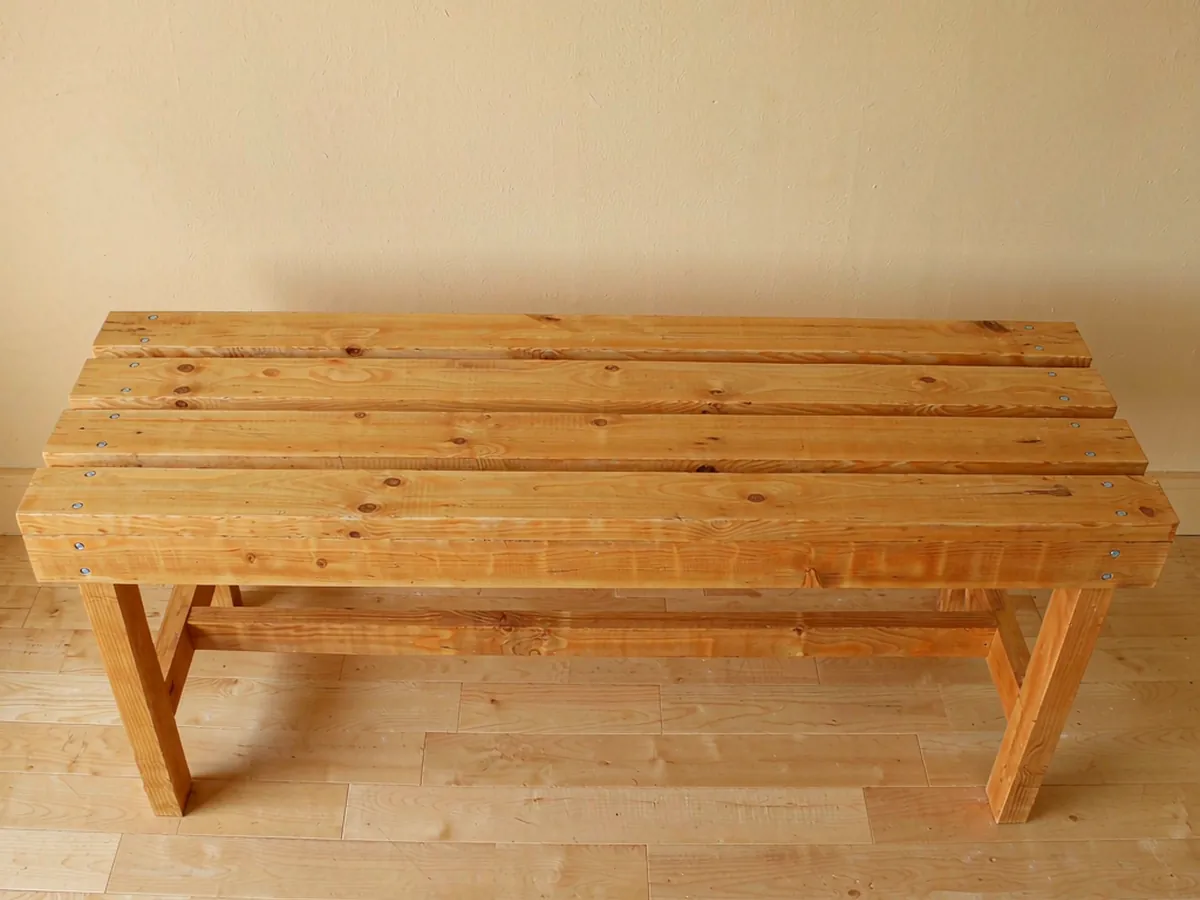
The four numbers that decide the build
Get these right and the bench works. Get them wrong and no amount of sanding saves it.
Seat height, 17 inches. That is the height of a dining chair. Much lower and adults feel like they are sitting on a step.
Seat depth, 16 inches. Deeper feels roomy until your feet stop reaching the ground. Sixteen inches suits most adults.
Length, 48 inches. Two people need 24 inches each. Four feet is the smallest size that does not feel like a squeeze.
Slat gap, 1/4 inch. Water has to fall through the seat, not sit on it. Tight slats turn a bench into a puddle.
Write those four down before you buy anything. Every cut below comes from them.
Boards, screws and the two tools that matter
You do not need a workshop. You need a saw that cuts straight and a drill that holds a bit steady.
| Part | Size | Quantity |
|---|---|---|
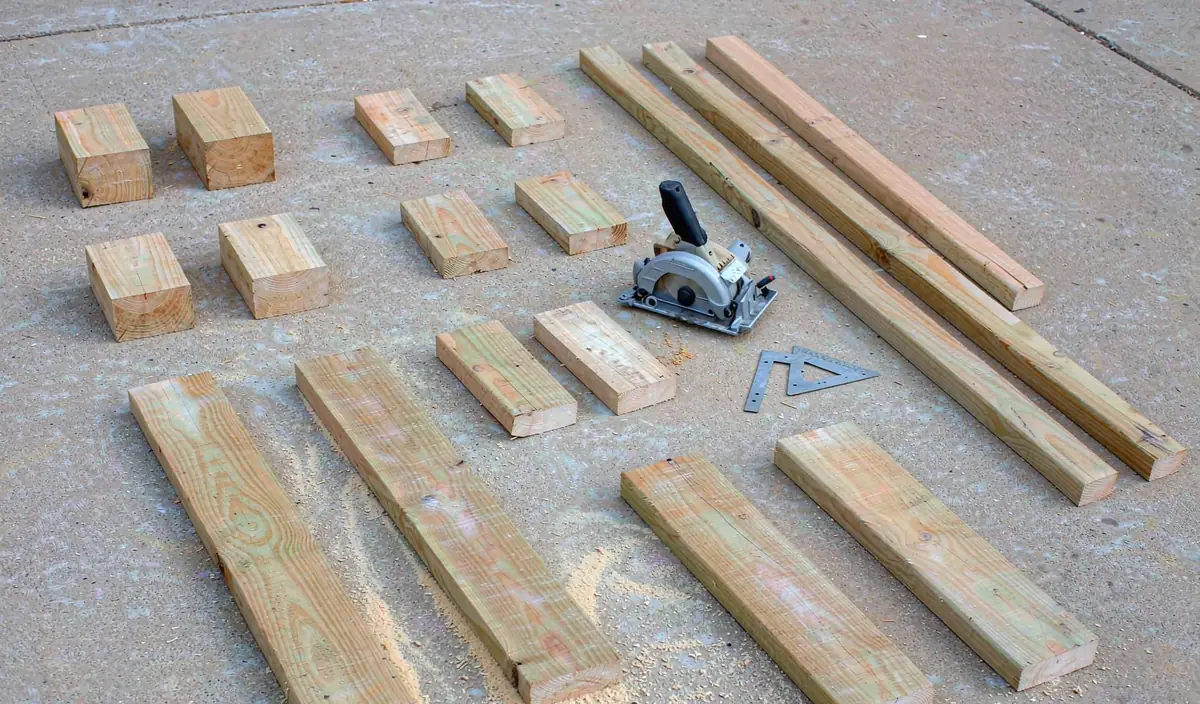
| Legs | 2x4, cut to 16 1/4 inches | 4 |
| End aprons | 2x4, cut to 13 inches | 2 |
| Long aprons | 2x4, cut to 41 inches | 2 |
| Seat slats | 1x3, cut to 48 inches | 6 |
| Screws, frame | #8 exterior, 2 1/2 inches | 24 |
| Screws, seat | #8 exterior, 1 1/4 inches | 24 |
Buy two 8-foot 2x4 boards and three 8-foot 1x3 boards. That is the whole lumber list, with a little spare.
Use stainless or coated deck screws. Plain steel screws rust in a season and stain the wood black around the head.
Two tools earn their keep here. A speed square keeps every cut and every frame at 90 degrees. A pair of clamps holds a joint still while you drive the second screw.
One bench, three lengths
The four numbers stay put. The length is the only thing that moves.
| Finished length | Who it suits | Long aprons | Slats |
|---|---|---|---|
| 36 inches | One person, plus a bag or a cup | 29 inches | 36 inches |
| 48 inches | Two people, no elbows out | 41 inches | 48 inches |
| 60 inches | Two people with room, or three | 53 inches | 60 inches |
Leg length never changes, so the seat stays at 17 inches whatever size you pick.
At 60 inches, add a fifth leg in the middle. Four legs spread that far apart let the seat sag within a year or two.
Cut straight, then check the square
A circular saw only cuts straight when its guide is straight. Clamp a straight board along the line and run the shoe against it.
Set the blade depth so one tooth clears the wood. A blade buried in the cut runs hot and burns the edge.
Cut to the waste side of the line, then sand back to it. A saw cut that follows the pencil line exactly will come out a hair short.
Sight down the edge of every 2x4 before you buy it. A bowed board makes a leg that no amount of force will square up.
Cut all four legs from one board. Boards from the same stack move together, so the bench stays flat as the seasons change.
Two end frames first
An end frame is two legs and one short apron. Build both flat on the ground, because that is the only way to keep them square.
Stand two legs 13 inches apart, with the wide face of each 2x4 facing you. Lay the end apron between them, flush with the top.
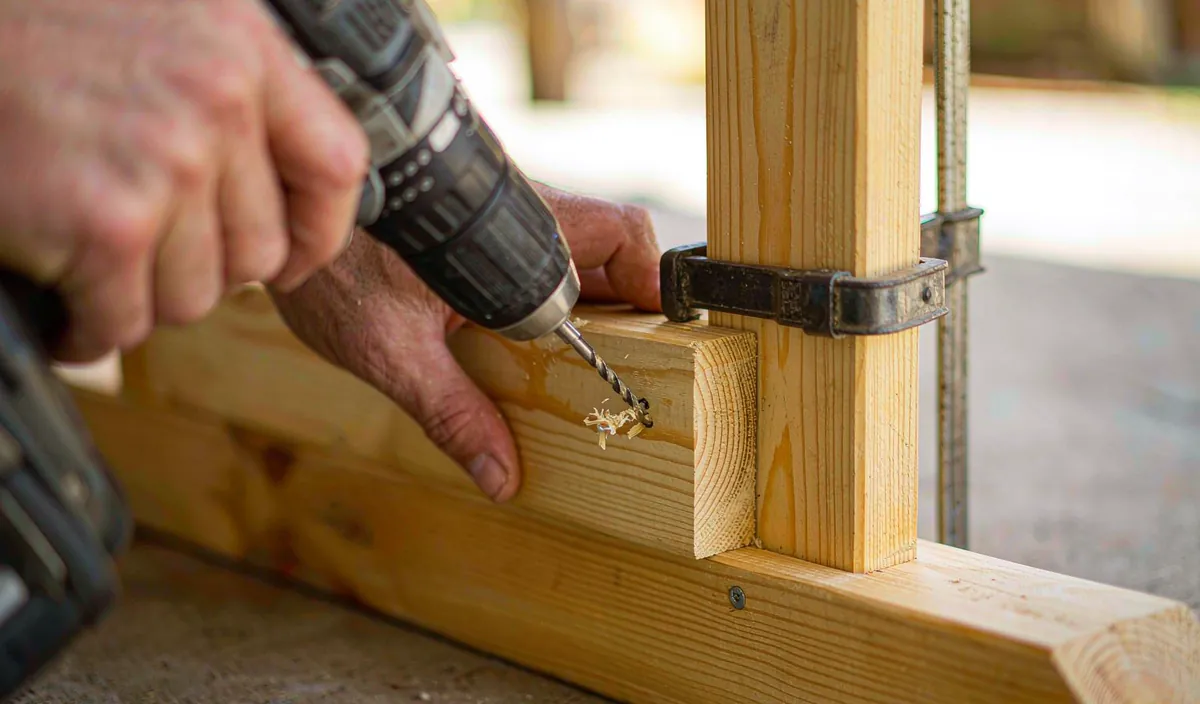
Drill two pilot holes through the apron into each leg. Then drive the screws.
Set the frame down and measure both diagonals. They should match to within 1/8 inch.
If they do not match, the frame is a parallelogram. Tap one end until the diagonals agree, and the whole bench will sit true.
The long aprons tie the frames together
Stand both end frames up and set the two long aprons between them. The top of every apron should sit level with the top of the legs.
Clamp one apron in place and check the frame for square before you drill. Tap the ends until the diagonals match, then screw through.
Do the same on the other side, then add the second long apron at the back.
You now have a box with four legs and four rails. Push down on a corner. Nothing should move.
If it does move, one screw is loose or one apron is short. Find it now, before the seat goes on.
Slats, with room to drain
Lay the six slats across the aprons, working from the front. Start with the first slat flush with the front leg.
Slide a 1/4 inch spacer between each pair as you go. A piece of scrap works, or four pennies taped together.
The last slat may hang a hair proud at the back. Let it. A tiny overhang looks better than a squeezed gap, and the water still drains.
Check the overhang at each end before you fasten anything. The slats should run past the legs by the same amount on both sides.
Two screws per slat, driven at a slight angle into the apron. Angle them in opposite directions so the slat cannot creep sideways.
Pre-drill every hole near an end
Wood splits along the grain when a screw pushes it apart. The end of a board splits easiest, because there is nothing past it to hold the fibers together.
Every screw that goes into the end of a 2x4 needs a pilot hole. Use a bit about the width of the screw shank, not the threads.
Countersink the head a little so it sits below the surface. A screw head left proud catches a hand and traps water.
Drive the screws snug, not hard. One extra turn strips the hole, and a stripped hole in soft wood never holds again.
Add a back if you want one
A back changes the build, so decide before you cut. The two rear legs have to run past the seat.
Cut the rear legs at 40 inches instead of 16 1/4. That leaves the posts standing about 23 inches above the seat.
Add two back rails, 3 inches wide. Put one about 12 inches above the seat and the other about 20 inches up.
Lean the rails back by around 10 degrees. A perfectly upright back feels rigid, and most people slide forward after ten minutes.
The back pushes against the rear legs, so brace them. A short diagonal brace from each rear leg to the long apron stops the back from flexing.
One trade-off comes with a back. The bench will no longer tuck under a table, which is half the point of a backless seat.
Sand in two passes
Sand the whole bench before you think about finish. Oil over a rough surface locks the roughness in.
Start with 80 grit on the flat faces and the edges. Then run 120 grit over everything, including the underside of the seat.
Round the front edge of the seat slats with a few strokes at an angle. That one detail separates a homemade bench from a shop-made one, and it costs two minutes.
Wipe the dust off with a rag. Oil will not soak into a surface full of sawdust.
Making it stand flat
Even a square bench can rock on an uneven patio. The fault is usually the ground, not the bench.
Set the bench where it will live and push down on each corner in turn. One corner will lift, or one will drop.
Mark the leg that lifts, then take a sliver off the opposite foot with sandpaper on a block. Two or three strokes is usually enough.
Pads work just as well. Felt or rubber under each foot forgives a rough surface, and it keeps the end grain out of the water.
If the seat sits wrong
Seventeen inches is the plan. Real life sometimes lands somewhere else.
Too low is easy to fix. Screw a half inch pad under each foot, or add a cushion and accept it.
Too high takes more work. The legs unbolt from the aprons, so you can shorten all four and put the frame back together.
Take an inch off each leg and the seat drops an inch. Keep the cuts identical, or the bench will rock.
A seat that feels too deep is a different problem. It is rarely the depth. Most people are reaching for a back, and a cushion behind them fixes it.
Oil, not varnish
A bench in the weather wants a finish that soaks in. Varnish and polyurethane sit on top, then crack when the wood moves.
Wipe on a thin coat of oil with a rag, along the grain. Wait fifteen minutes, then wipe off whatever is still wet.
One coat is enough for a bench under a roof. A bench in the open wants two, a day apart.
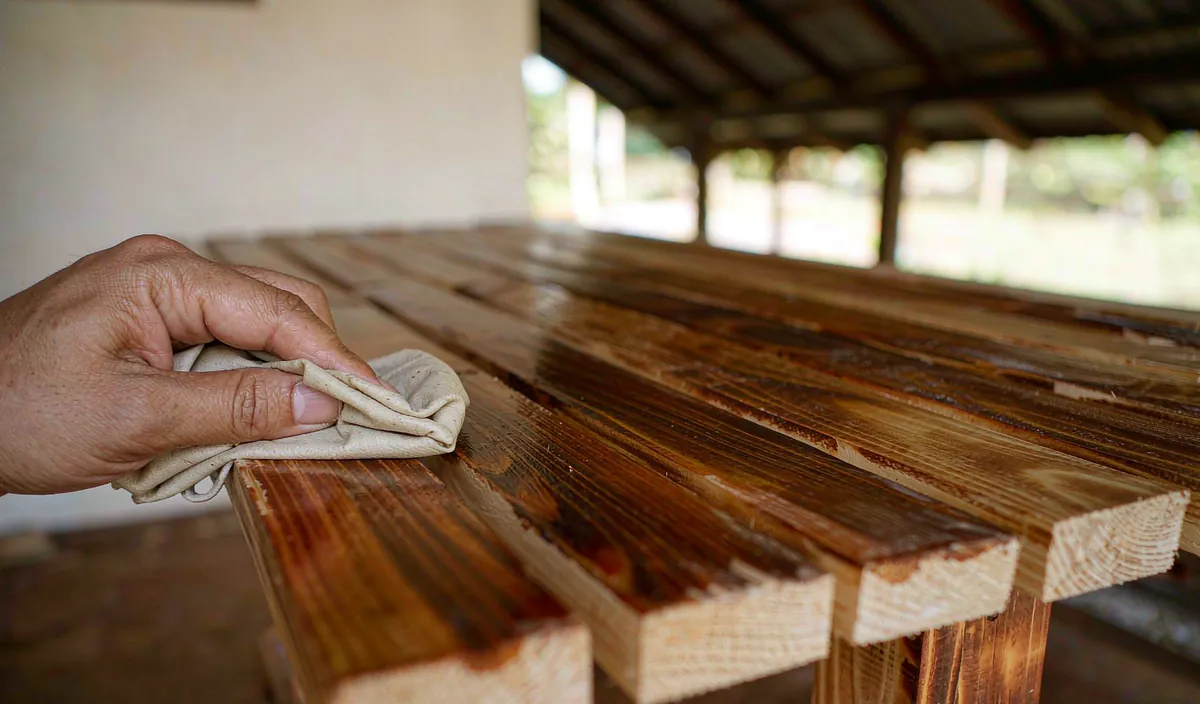
Pick the oil with care. Boiled linseed oil works and darkens with age.
Teak oil is a blend, not a tree. The care guide compares the four common finishes and what each one lasts.
Three mistakes that ruin a first bench
Skipping the diagonal check. A frame that is off by a quarter inch looks fine on the ground. Stand it up and the bench rocks on two legs forever.
Screwing into end grain without a pilot hole. The leg splits, usually right down the middle. No glue pulls that back together.
Cutting the legs before the slats arrive. Slat thickness varies between batches. Measure your actual slats, then cut the legs so the finished seat lands at 17 inches.
There is a fourth mistake, and it is the most common. Buying 2x4s without looking at them. Pick boards that are straight along the edge, because a bowed leg will not square up.
Build or buy
Lumber for this bench costs less than any bench in a store. The tools cost more, and you buy them once.
Building wins when you want a size nobody sells, or when you already own a saw and a drill. It also wins when you would rather repair one part than replace the whole thing.
Buying wins on finish and on time. A hardwood bench arrives square, sanded and oiled, and it outlasts pine in the weather.
The buying guide walks through the same four numbers from the other side. Start there if you are still deciding.
Common questions
Do I need a pocket hole jig?
No. Butt joints with two screws per end hold a bench this size. A jig makes the joints neater and costs more than the lumber.
What wood should I build with?
Cedar and pressure-treated pine are the two sensible choices for a first bench. Cedar is lighter and easier on tools. The wood guide covers how each one ages outdoors.
How many screws per joint?
Two per apron end, set about an inch apart and staggered. Two screws stop the joint from rotating. One lets it pivot.
Can I build this bench from cedar fence pickets?
You can, and it is the cheapest version. Pickets are thin, so use three screws per slat and expect a shorter life.
Is 48 inches long enough for two people?
Yes, if both sit square to the seat. If you want room to sprawl, go to 60 inches and add a third leg in the middle.
Should I paint it instead of oiling?
Paint works, but only on bare wood and only with a primer made for outdoors. Once paint cracks, water gets behind it and the wood stays wet.
How do I stop the bench sliding on a deck?
Screw a rubber foot under each leg, or set the legs on four small blocks of scrap. Water drains better with the feet raised, too.
Can one person carry it?
A pine bench this size weighs around 25 pounds, so yes. Build it in cedar and you can move it with one hand.
Can I use deck boards instead of 1x3?
Yes. A 5/4 deck board is 1 inch thick instead of 3/4, so cut the legs a quarter inch shorter. The seat still lands at 17 inches.
How much weight will it hold?
Two adults, easily. Past that, the apron ends carry the load, and four screws are doing most of the work.
Where should the bench go?
A patio or a porch suits this shape. The patio guide covers spacing and layout. The small bench guide covers the shorter version for a tight spot.
The short version
Cut four legs at 16 1/4 inches, then build two end frames and check both diagonals. Add the long aprons, then the slats with a 1/4 inch gap between them.
Pre-drill every end-grain hole. Sand with 80 then 120, and ease the front edge of the seat. Finish with a thin coat of oil, not a film.
Set it where it will live and shave the foot that rocks. That last step takes two minutes and saves a season of annoyance.